Exploring Uncut - March 24th, 2025
Structs, classes and memory
I continued my reflection on how value and reference semantic impacts the memory allocation in the generated code.
Given there’s now an active Embedded Swift channel on The Swift Programming Language Discord, I asked the question there. Some comments led me to revisite the test examples I made earlier and update them. It started to make slightly more sense but not yet totally.
But then AliMark71 posted a link to the Explore Swift performance video by John McCall from WWDC 2024. And this video answers most of the questions I had, explaining in detail the different cases of how Swift would decide where to allocate memory from. I highly recommend watching this video and in fact will watch it again as it contains quite a bit of information to ingest.
And as is often the case with WWDC videos, I went down the dependency tree and started watching referenced videos:
- Understanding Swift Performance by Kyle Macomber and Arnold Schwaighofer from WWDC 2016
- Building Better Apps with Value Types in Swift by Doug Gregor and Bill Dudney from WWDC 2015
- Protocol-Oriented Programming in Swift by Dave Abrahams from WWDC 2015
It’s a pity but it seems videos of the later are not available on-line anymore. However you can check the WWDC Notes for all those videos:
- Explore Swift performance
- Understanding Swift Performance
- Building Better Apps with Value Types in Swift
- Protocol-Oriented Programming in Swift
Those presentations contain a lot of useful information, sometimes covering things I’m using in my Swift code but did not grasp the fundamentals of or the ideas behind them to their full extent.
Getting the round display working
Debugging the screen
The Logic Analyzer I ordered arrived last week. This is a cheap Chinese version I ordered on Ali Express. Quite incredible that this thing costs less than 6 €. For the software, there are multiple choices available, but to start I decided to try out Logic 2 from Saleae. The freely available software is designed for their hardware but also works with many other ones. I’m not sure how they feel about people using their software this way but I can’t justify spending 500 € or more on their hardware for my usage. I might move to the open source PulseView - sigrok software in the future tough.
In order to connect the signals to capture to the analyzer, I connected the display to a bread board first and from there to the boards. First to the XIAO board, that works as expected, then to the nRF 52840 DK.
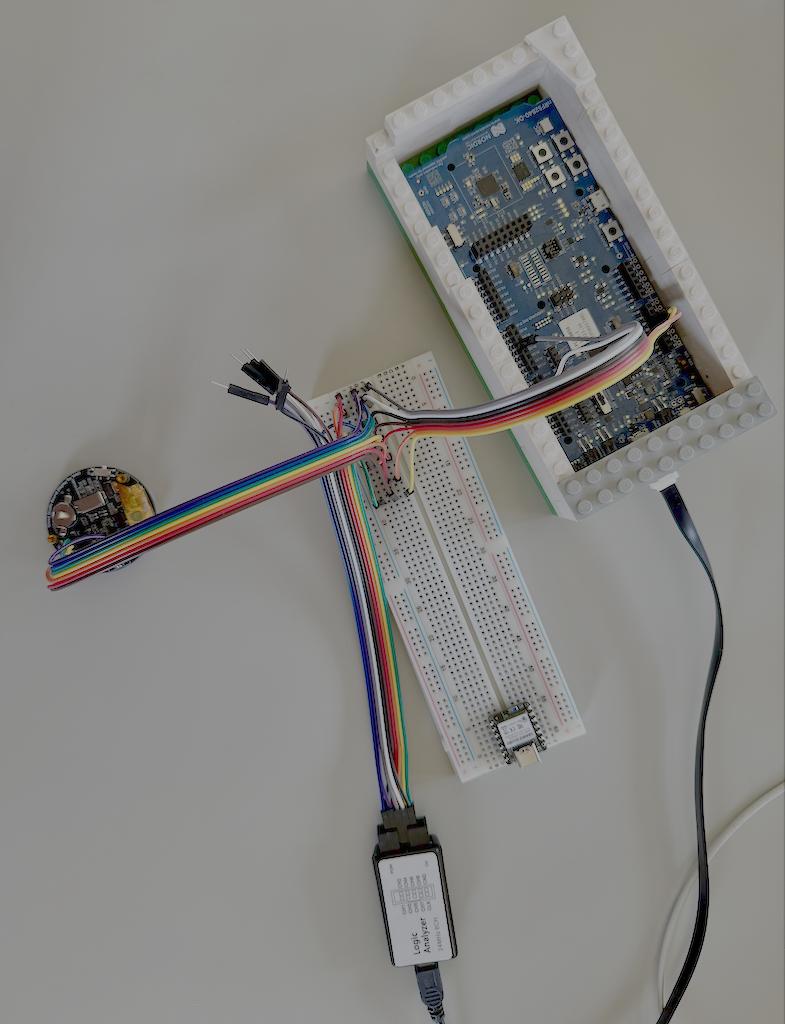
Cabling the display through a bread board to allow connecting the logic analyzer.
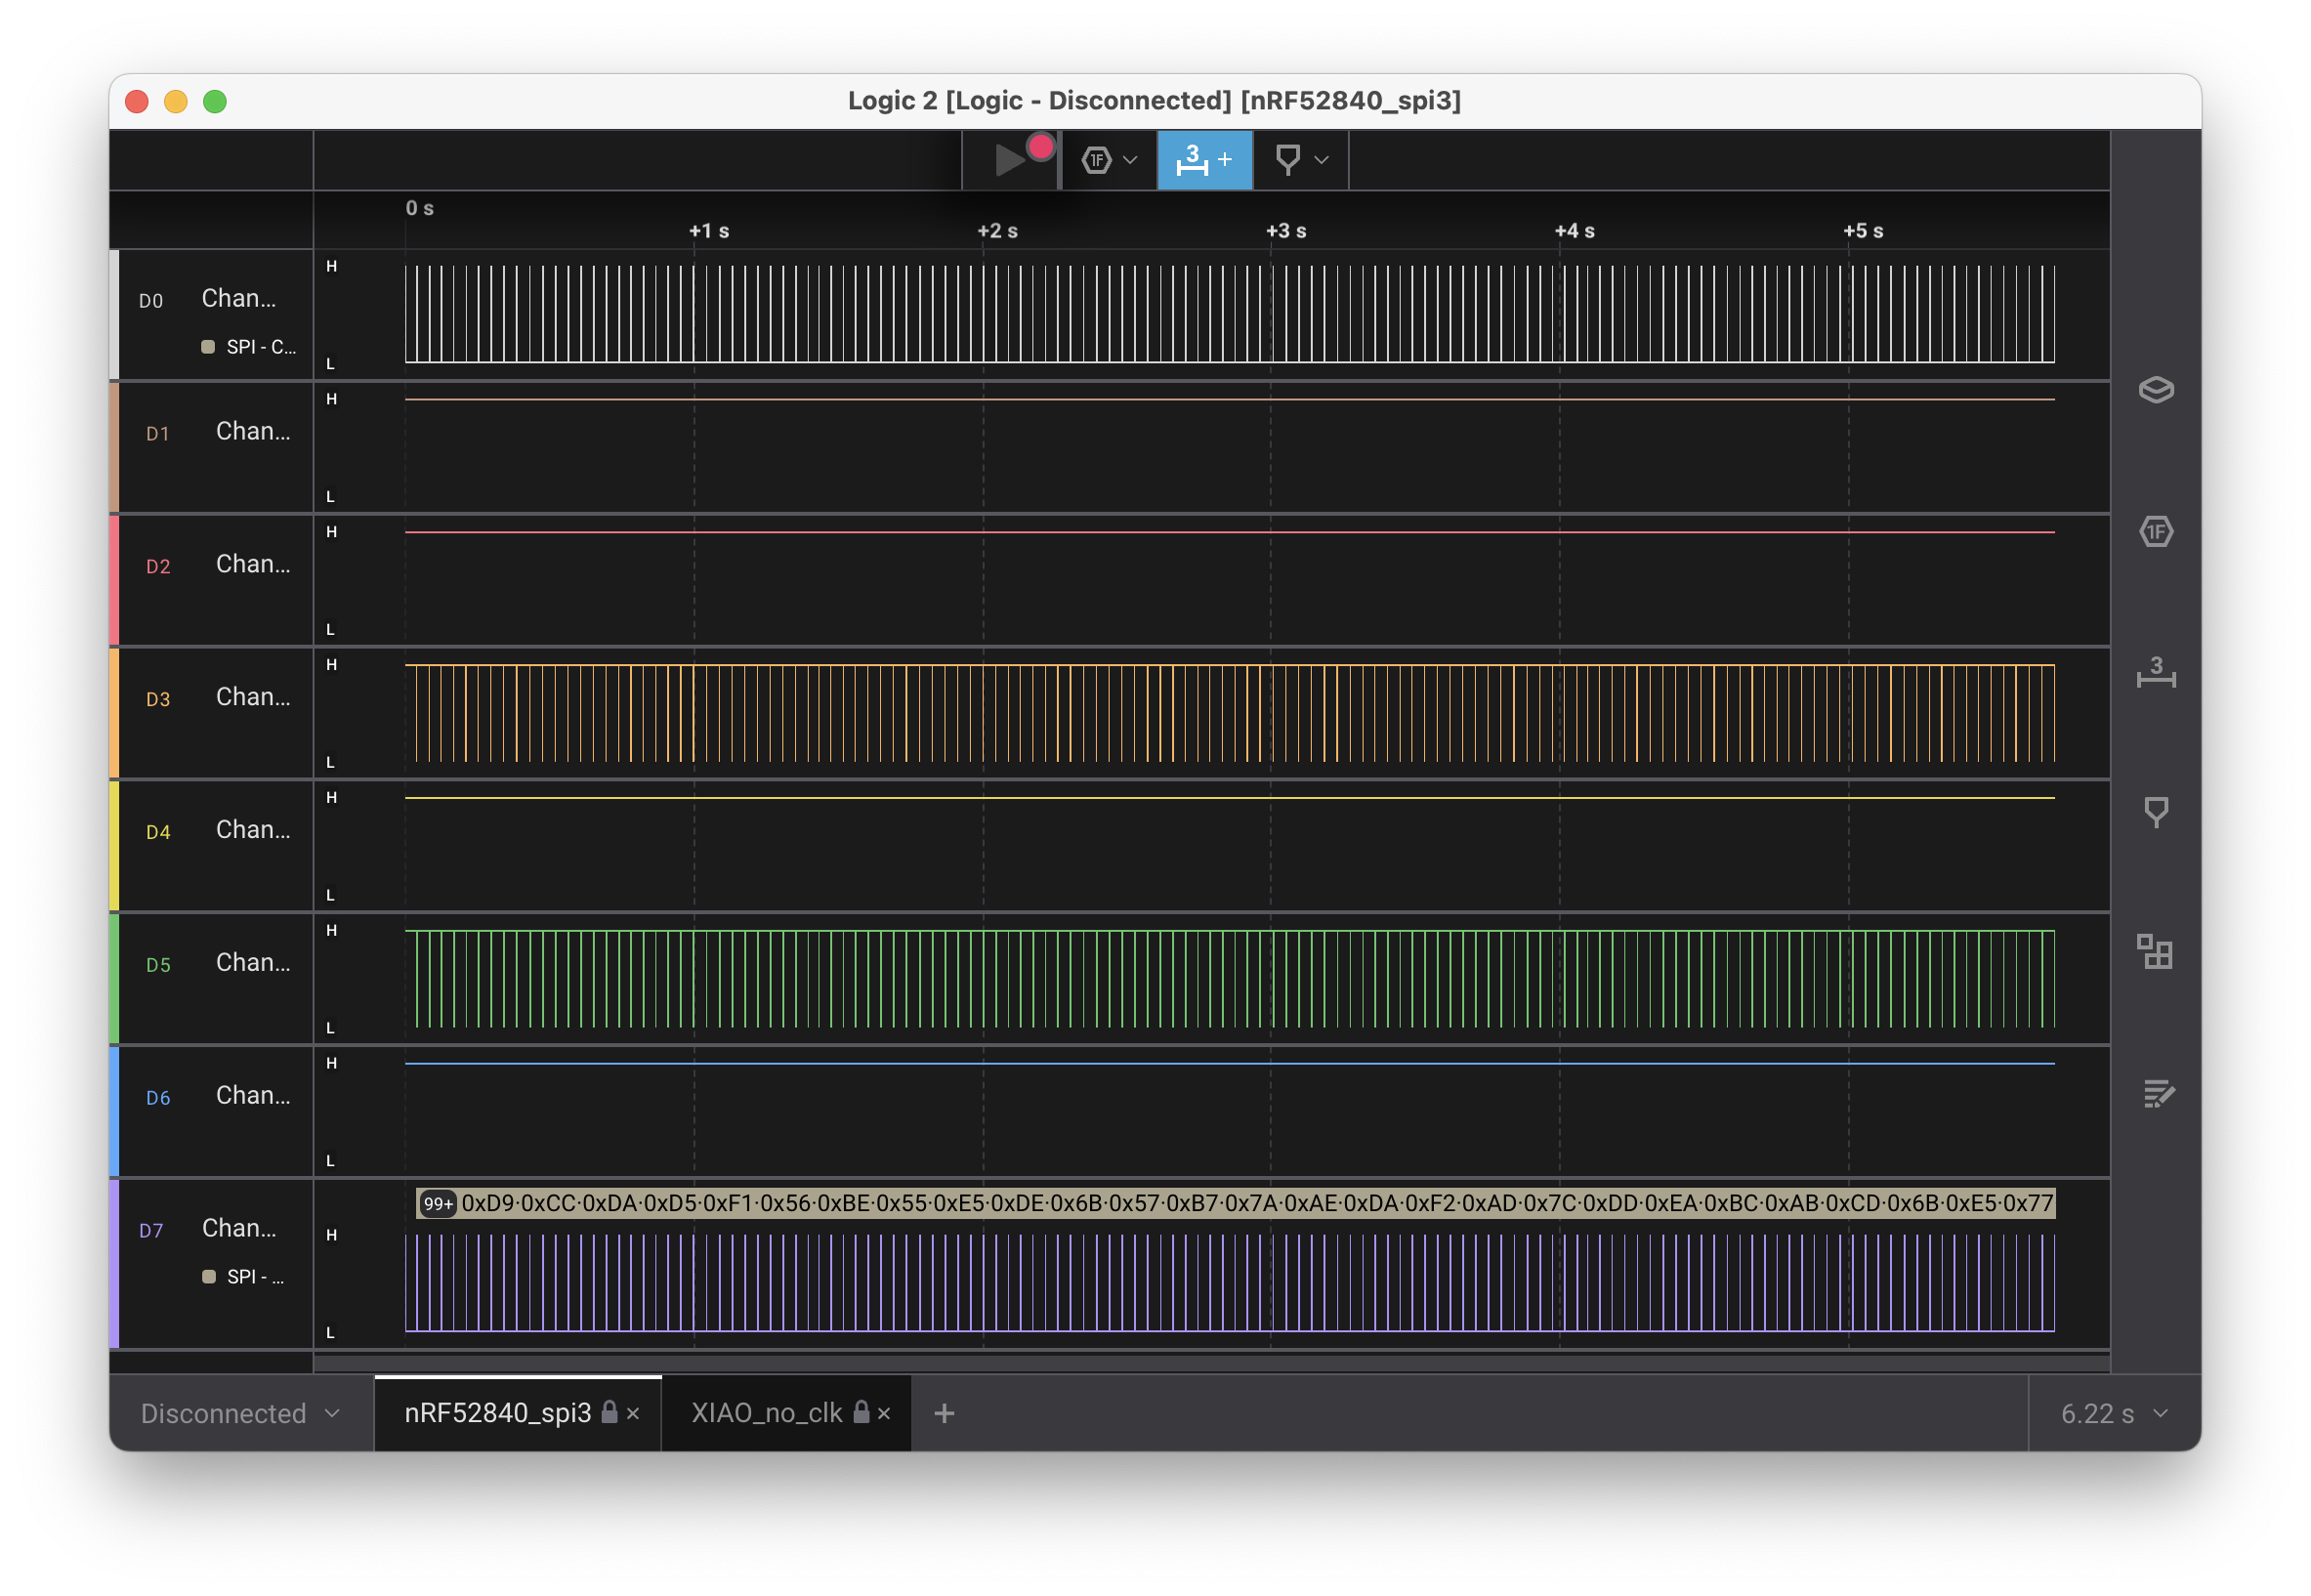
I was hoping to clearly see some missing or wrong signal, but at first glance, I could not see much difference between the two captures. Also this is my first time working with a logic analyzer and I only have a very high level knowledge of how SPI works.
Capture of the working display on a Seeed Studio XIAO nRF52840. Capture of the blank display on a nRF52840 DK. I don’t know what to make out of this.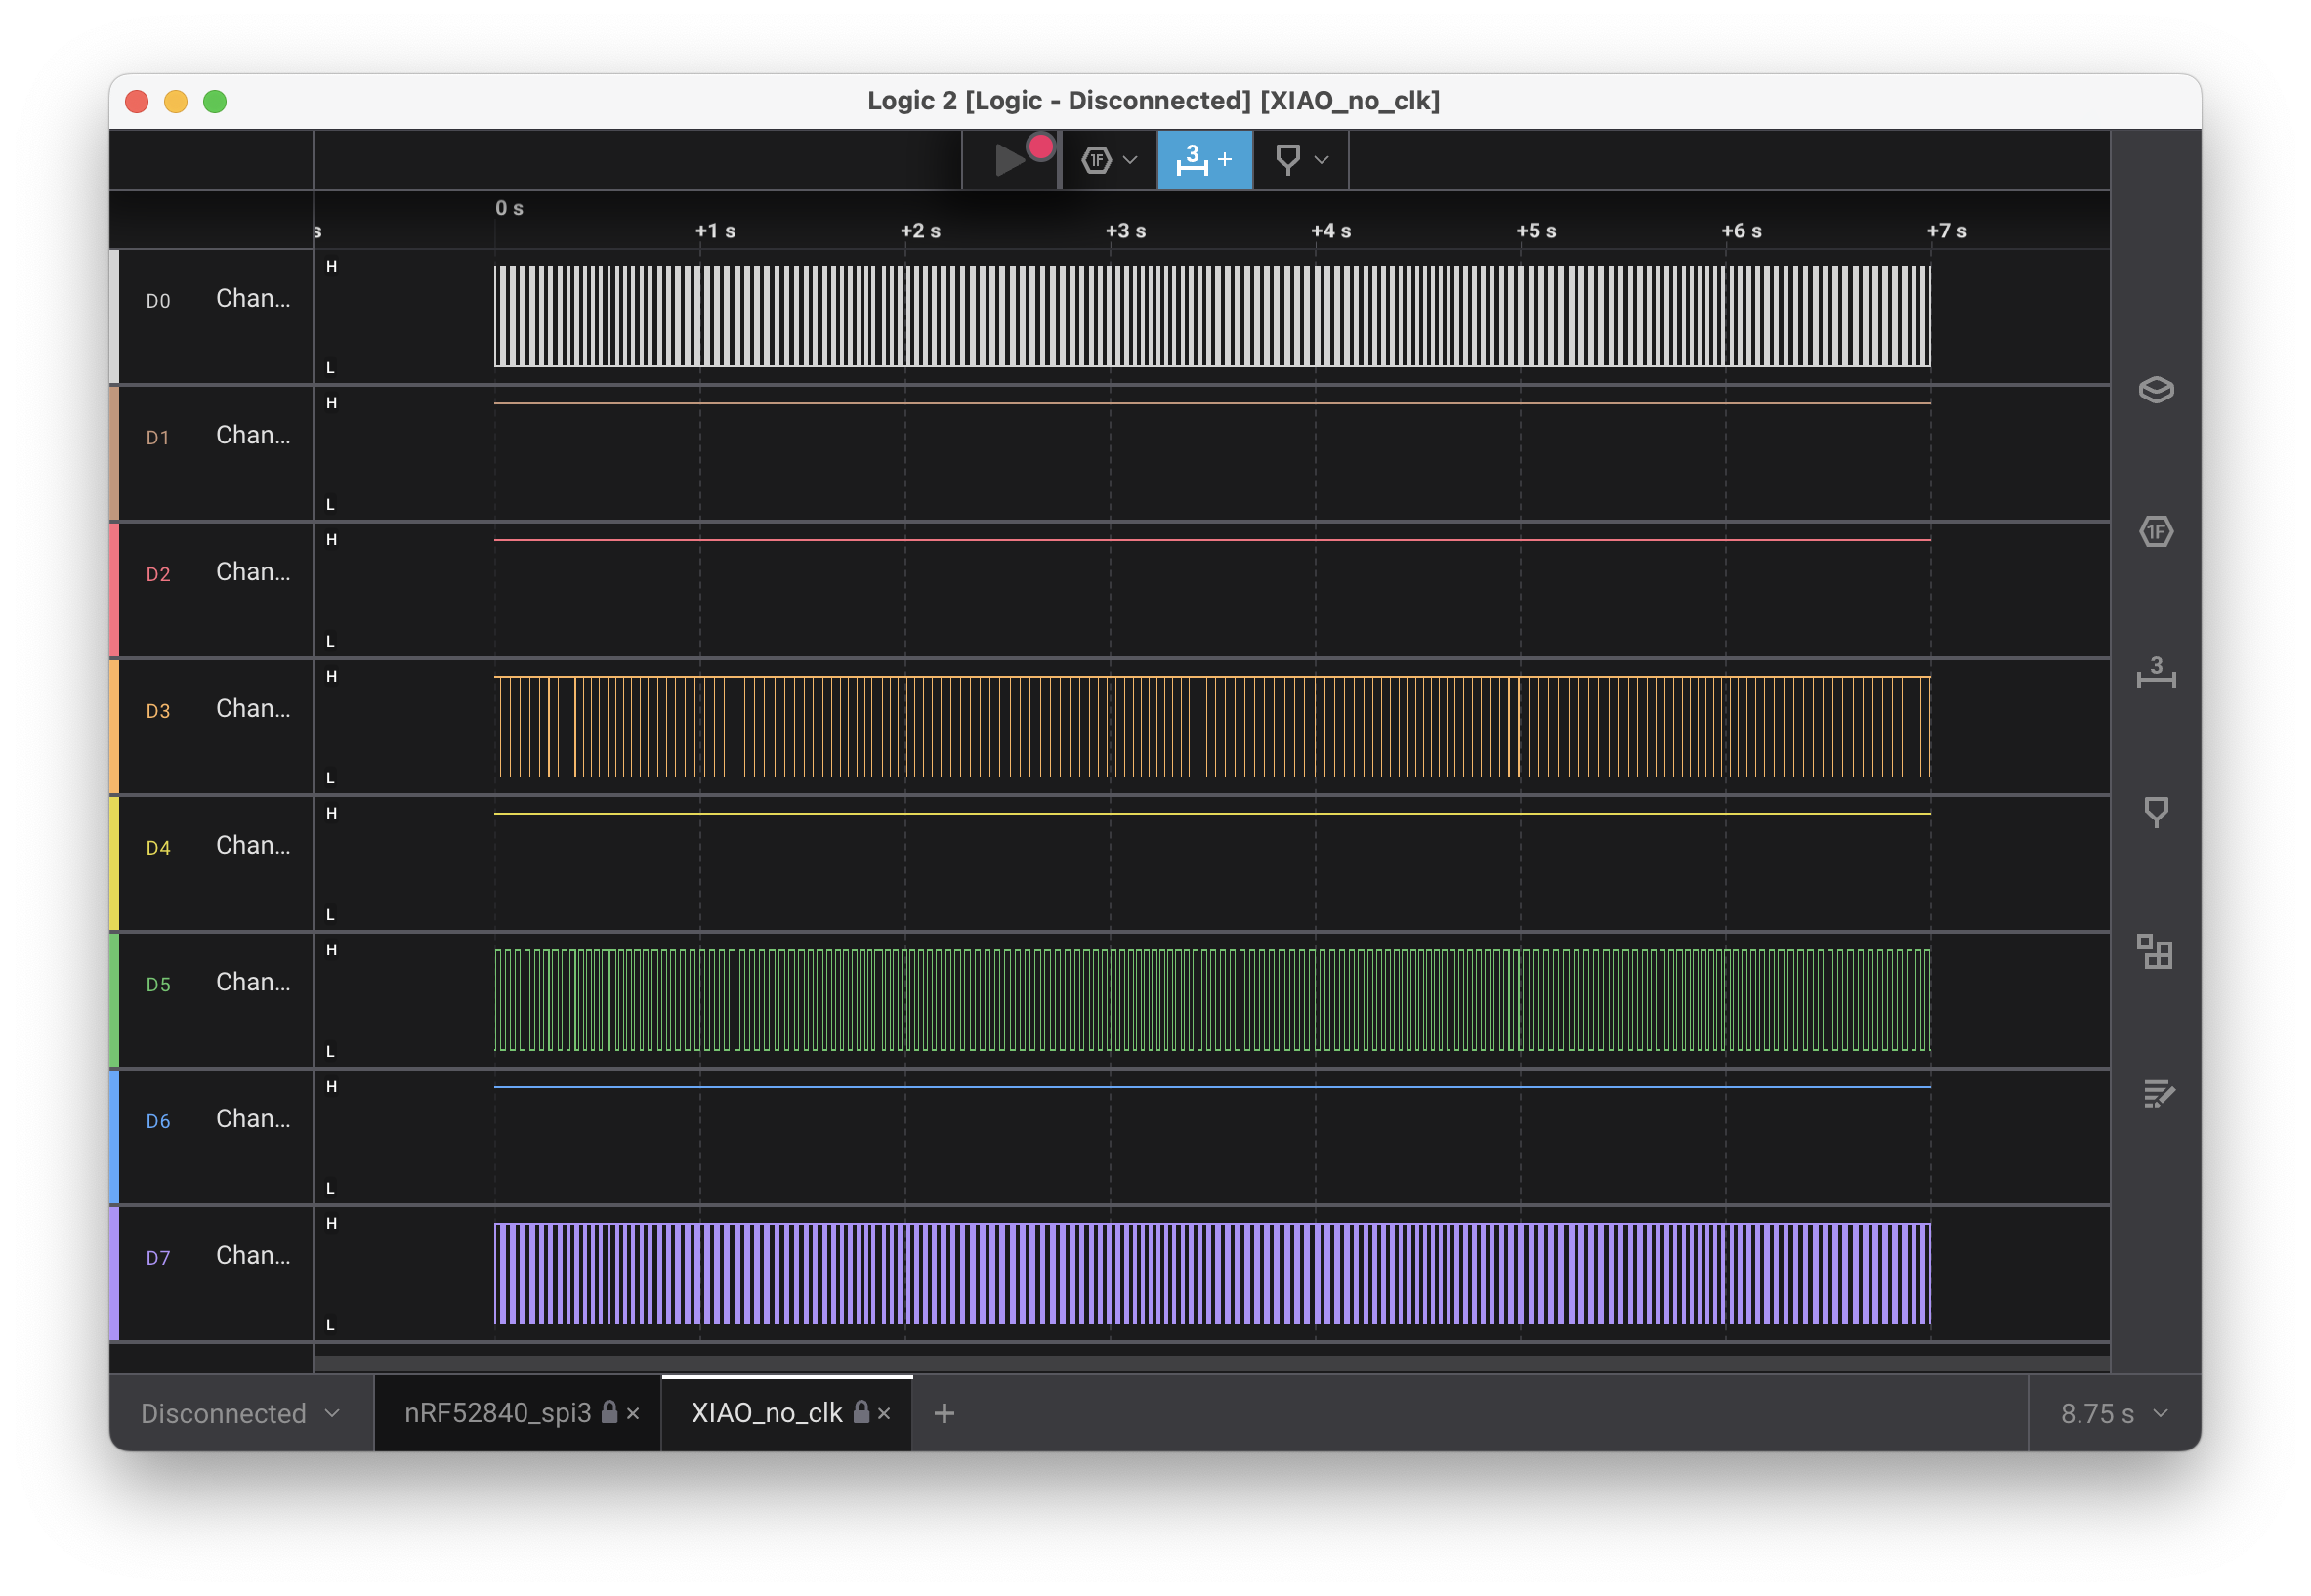
The logical next step I would take would be to study in more detail what I don’t know. Use a simple sensor connected via SPI where I could send a few bytes at a time and check the capture. Read about what the capture software can do and experiment with it. Understand SPI in much more details. Look at the source code of the display driver and how it uses SPI under the hood.
But I wasn’t thrilled about how much time this would take and was eager to get the display working.
So I gave ChatGPT a try. I explained what I wanted to do, indicated the connections I had made, the PINs I used and the DTS configuration I wrote. It pointed out that my cabling was wrong and proposed another one. It turned out that the proposed cabling was even less correct but it had correctly discovered an issue with mine. After triple checking I found the error and fixed it.
But the display stayed blank.
I continued my discussion with ChatGPT and as I had enabled logging at the SPI level using the following snippet
CONFIG_LOG=y
CONFIG_DISPLAY_LOG_LEVEL_DBG=y
CONFIG_SPI_LOG_LEVEL_DBG=y
in my prj.conf file, I also provided debug logs (those seemed to indicate that the SPI transactions were successful tough).
ChatGPT proposed other configuration changes (mostly incorrect) but also listed some additional checks and changes I could try. One of those was talking about the frequency used for SPI and indeed, that turned out to be the issue.
When I set the frequency to a lower value, I finally had the display working as expected.
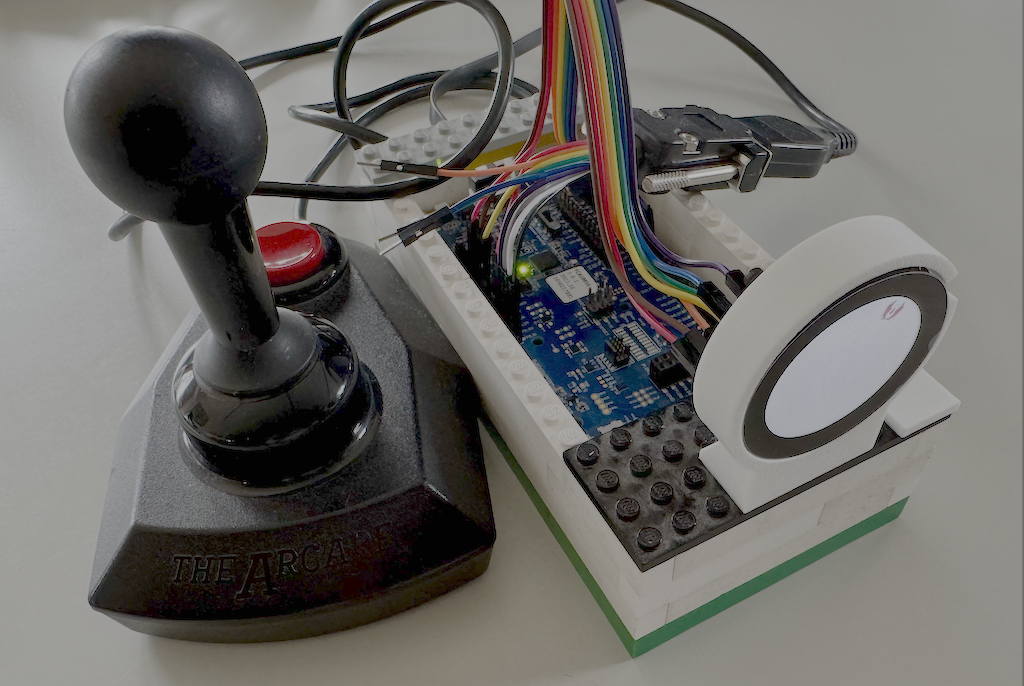
Integrating the joystick control
Instead of having the spaceship go round the screen, I now wanted to control it with the joystick. So I hooked up my adapter to some available PINs, configured the GPIOs in the project, wrote the code to read the joystick position and move the spaceship accordingly. And nothing happened—the spaceship was motion less!
This time I had a good hunch for what the issue could be (I knew I was just being lazy but took my chance anyway). Looking into the board DTS files (nrf52840dk_nrf52840-pinctrl.dtsi and nrf52840dk_nrf52840.dts) confirmed that the PINs I was connected to were used by SPI1, enabled by default. As it is not in used, I disabled it in my overlay and all was fine.
I had quickly slapped together some test code and now wanted to organise it a bit better.
I thought “why re-invent the wheel ?”. Could I use some standard API, one that Swift developers might already know?
Apple has a whole Game Controller API available, could I make an implementation of that ? Turns out, this API is quite generic and has a large surface, too much for my first prototype here.
I only took a bit of inspiration from it and ended up with this simple code for now.
struct DirectionPadState {
  var upPressed: Bool
  var downPressed: Bool
  var leftPressed: Bool
  var rightPressed: Bool
}

struct Joystick {
  private(set) var dpadState: DirectionPadState
  private(set) var fireButtonPressed: Bool

  private var upGPIO: UnsafeMutablePointer<gpio_dt_spec>
  private var downGPIO: UnsafeMutablePointer<gpio_dt_spec>
  private var leftGPIO: UnsafeMutablePointer<gpio_dt_spec>
  private var rightGPIO: UnsafeMutablePointer<gpio_dt_spec>
  private var buttonGPIO: UnsafeMutablePointer<gpio_dt_spec>

  init(upGPIO: UnsafeMutablePointer<gpio_dt_spec>,
        downGPIO: UnsafeMutablePointer<gpio_dt_spec>,
        leftGPIO: UnsafeMutablePointer<gpio_dt_spec>,
        rightGPIO: UnsafeMutablePointer<gpio_dt_spec>,
        buttonGPIO: UnsafeMutablePointer<gpio_dt_spec>) {
    self.upGPIO = upGPIO
    self.downGPIO = downGPIO
    self.leftGPIO = leftGPIO
    self.rightGPIO = rightGPIO
    self.buttonGPIO = buttonGPIO

    gpio_pin_configure_dt(upGPIO, GPIO_INPUT)
    gpio_pin_configure_dt(downGPIO, GPIO_INPUT)
    gpio_pin_configure_dt(leftGPIO, GPIO_INPUT)
    gpio_pin_configure_dt(rightGPIO, GPIO_INPUT)
    gpio_pin_configure_dt(buttonGPIO, GPIO_INPUT)

    dpadState = DirectionPadState(upPressed: false, downPressed: false, leftPressed: false, rightPressed: false)
    fireButtonPressed = false
  }

  mutating func readState() {
    self.dpadState = DirectionPadState(upPressed: gpio_pin_get_dt(upGPIO) == 1,
                                downPressed: gpio_pin_get_dt(downGPIO) == 1,
                                leftPressed: gpio_pin_get_dt(leftGPIO) == 1,
                                rightPressed: gpio_pin_get_dt(rightGPIO) == 1)
    self.fireButtonPressed = gpio_pin_get_dt(buttonGPIO) == 1
  }
}
Modelling a screen support
Now that I started developing some basic interactions in the game, I needed to look at the screen more often. But with this contraption of cables connecting it to the board, it was difficult to get a clear view on it as it had a tendency to mostly lay flat on my desk.
I thus decided to 3D print a support for it and as I had already used some Lego© blocks to host my board in another project, I designed the support to attach to a Lego© plate.
I fired up Fusion 360, extracted some basic enclosure I already did in the past and extended it. The Seeed Studio round display has three threads at its back that you can use to screw it to a support. I remembered that in my previous project, although I made some measurement and tests, I was still slightly off for my support holes and I had used a drill to make them loose for the screws to fit.
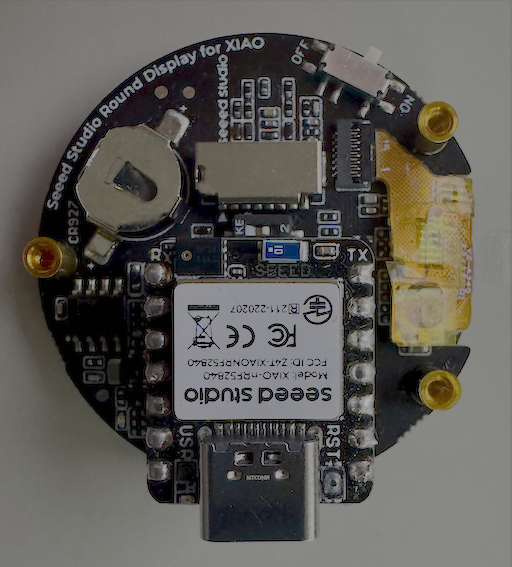
Three threads at the back of Seeed Studio Round Display allow to attach it to a support.
There’s an STL file on the Seeed Studio website with some enclosure for that display, with the holes properly positioned. As I did not know how to import the STL in Fusion AND keep the proper dimensions, I opened the STL file in Bambu Studio and use the measurement tool in there. This gave me some measurements but not the ones I was looking for (the angles between the holes as measured from the center of the display).
I could compute those angles based on some trigonometry formulae. But I never remember if I need to use sine or cosine, for the adjacent or opposite side… So I was lazy (and curious). Having drawn a schematic representation of the back of the display, with the measurements I had and the values I was looking for, I asked ChatGPT.
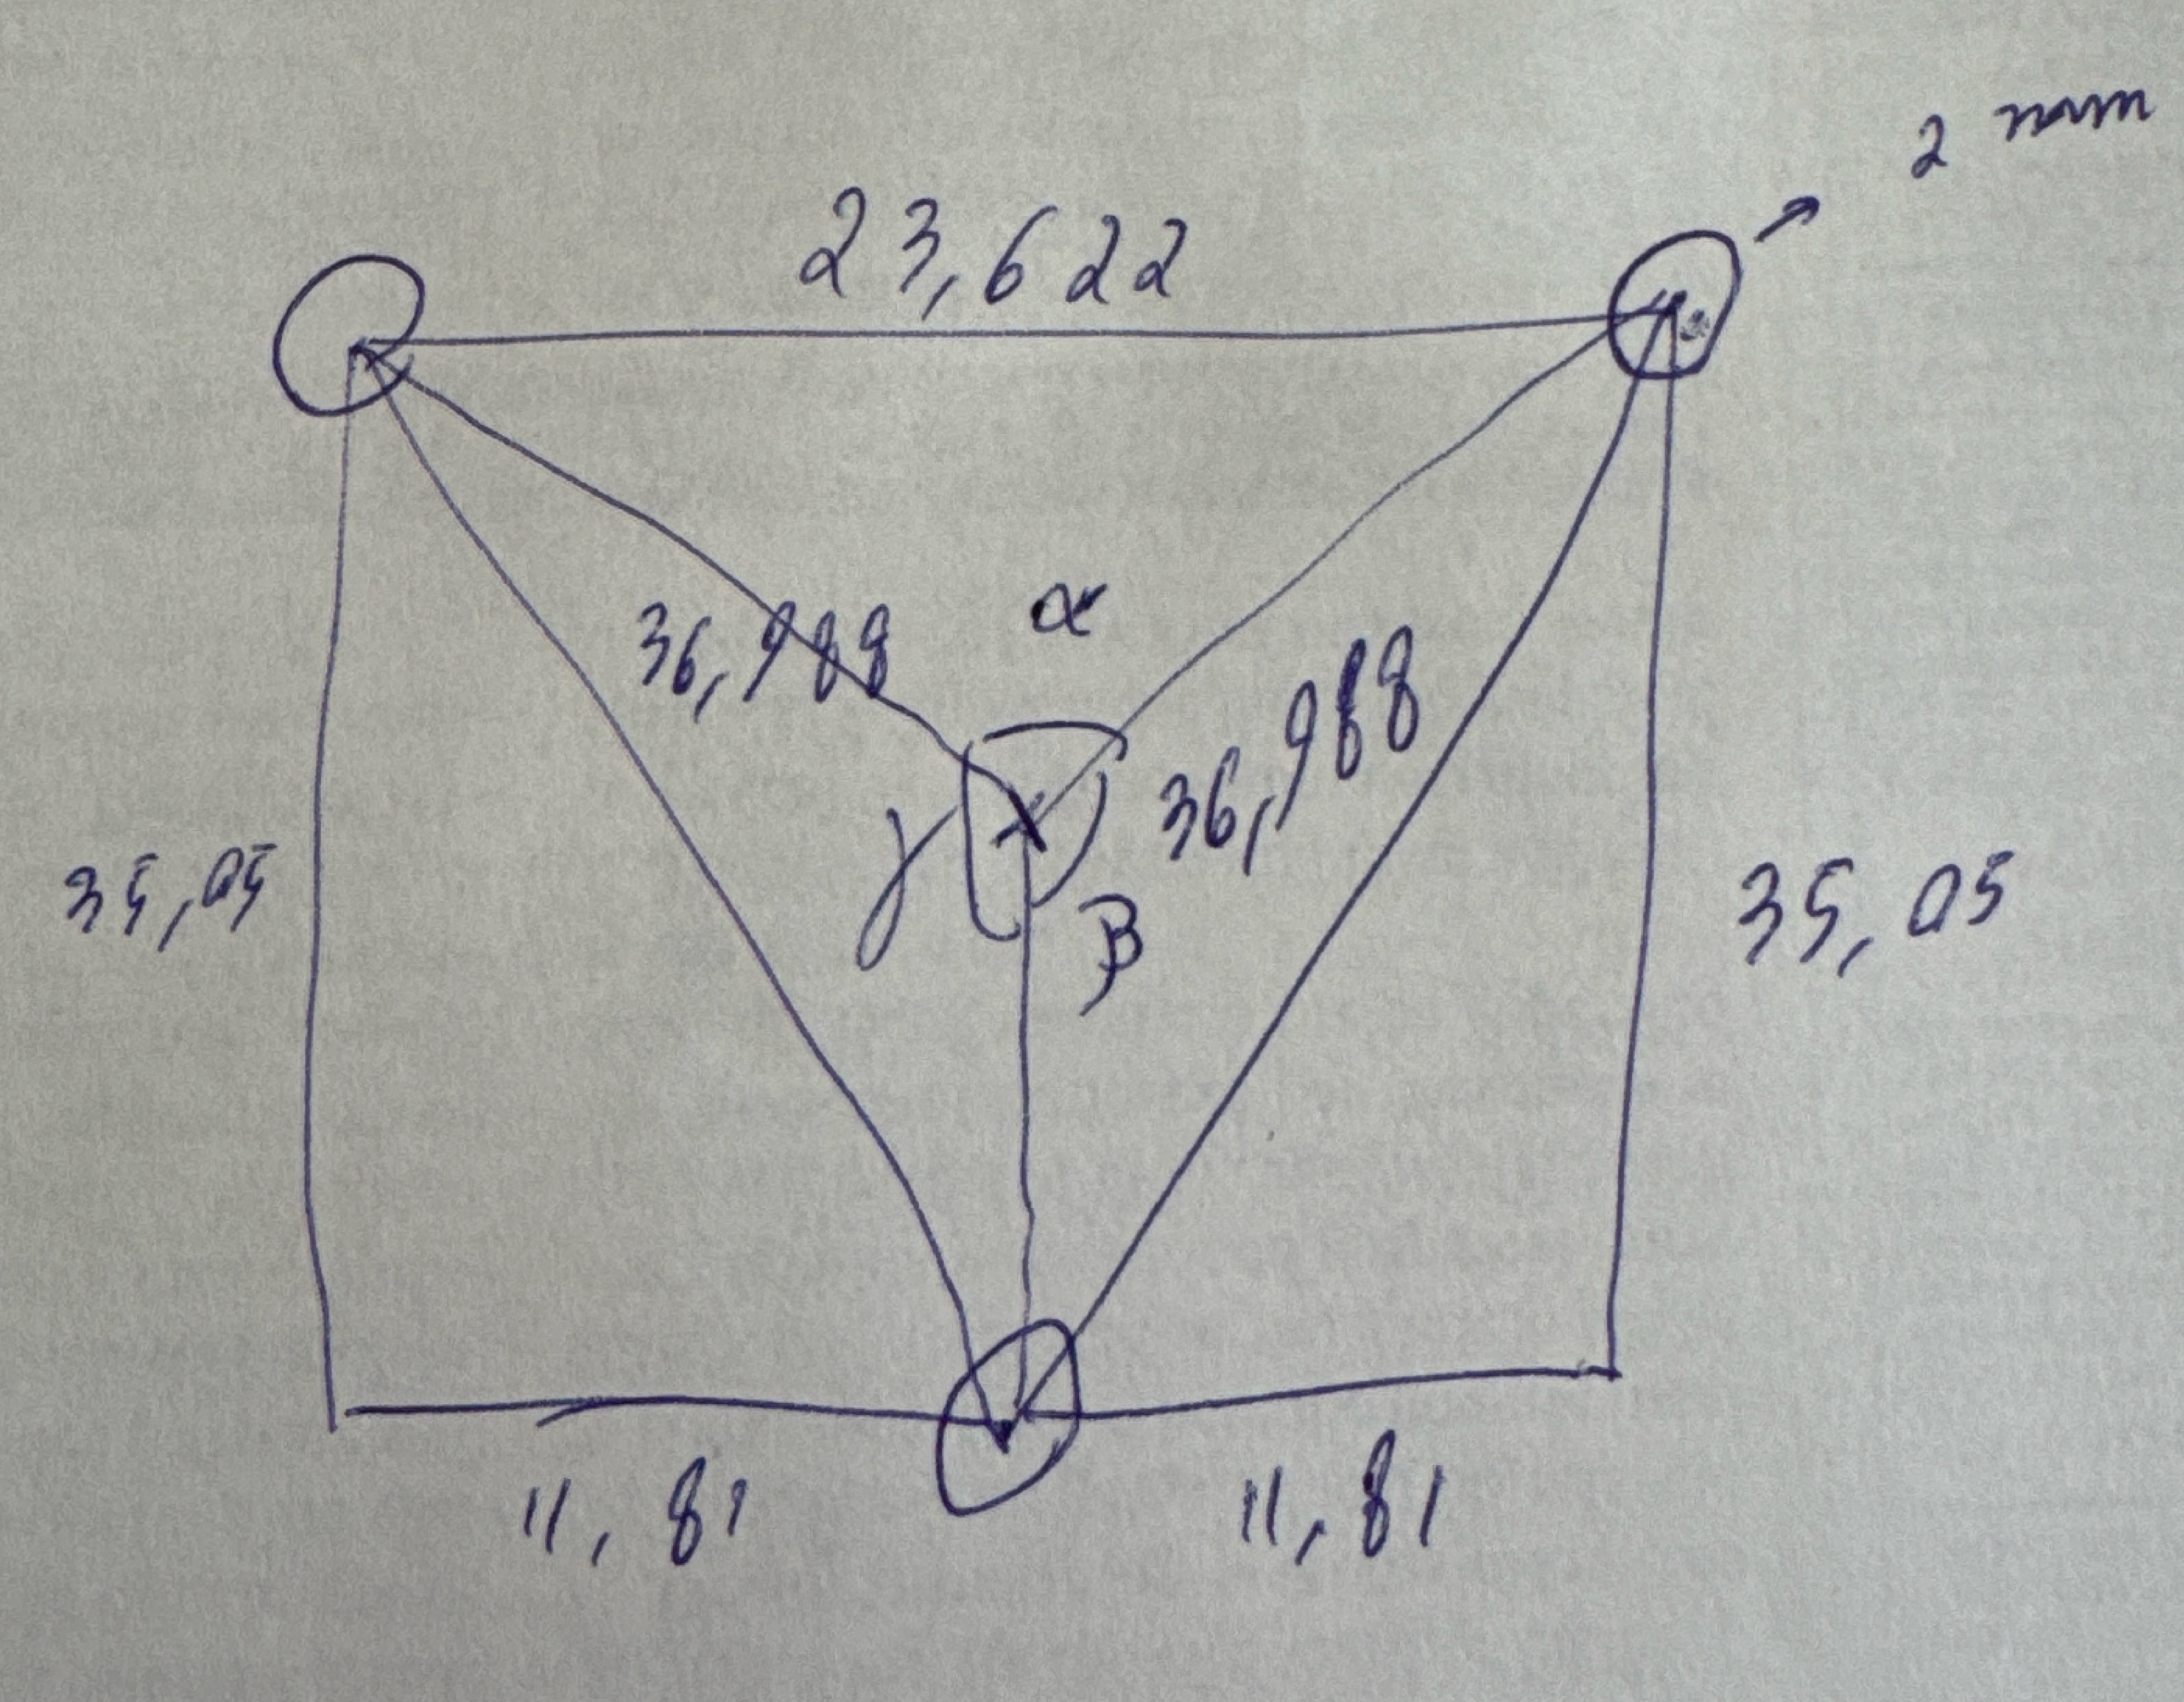
The doodle I gave ChatGPT to work with.
I eventually got the values I was after but it took several tries and I had to give additional information to ChatGPT to get there. In particular, the values it proposed did not pass the most basic test of common sense. For instance, it first gave me a value of alpha of about 30 degrees while it’s clear on the graph that it’s an obtuse angle. After I pointed that out, it answered something like 220 degrees. Again, obtuse angle. I also had to point out that beta and gamma where equals and that the sum of all three angles had to be 360 degrees.
What ChatGPT can accomplish is quite extraordinary, and it amazed me that it could make any sense out of the doodle I gave it. But I interpret this example as a proof that the generative AI extracts features of a text corpus but does not learn a model of the world based on it.
It is interesting to note that having that common sense is sometimes also missing in humans (and I’m certainly guilty as charged in certain situations to behave as such). For instance children learning maths or physics will trust the result of their calculation even when the answer doesn’t make any sense.
I kept using ChatGPT throughout the design process. For instance, I would capture my current Fusion 360 sketch, annotate it with some scribble of what I was after and ask for step by step instructions on how to make that happen. And for this task, the results were really good. It got me to the desired result much faster than using a search engine to lookup software features.
And at the end of the afternoon, I had my screen nicely vertically mounted. I was thrilled with the result so far and spend a good minute making the spaceship go left and right.
Now, all that’s left is writing more code.
The final setup, with the display attached in its 3D printed support.
Hacking with Swift+ livestream
Past Saturday, Paul Hudson hosted another of his monthly livestream during which we build an application from scratch. This time, it was a iOS word game.
Although I did not learn much in terms of code or API, I still get a lot of value out of those sessions. Practicing using the APIs for real applications, seeing when and why choosing one over the other makes sense and what the final result is gets them deeper under your skin (or in your head). So when it comes time to develop your own application, you’re that much more productive. As the saying goes “practice makes perfect”.
Then there’s the community of course. Working together towards that goal feels great. Seeing the questions other people have is really interesting. You get to help them if you can but it also makes you think about things in a different way. And as someone would likes to write and present talks, it’s interesting to understand what concepts people have more difficulties to grasp and what explanation makes more sense to them.
And finally, seeing what can be accomplished in less than two hours is a great reminder that you don’t need that much time to explore some idea you have and build something that people are interested in. This is an important source of motivation.
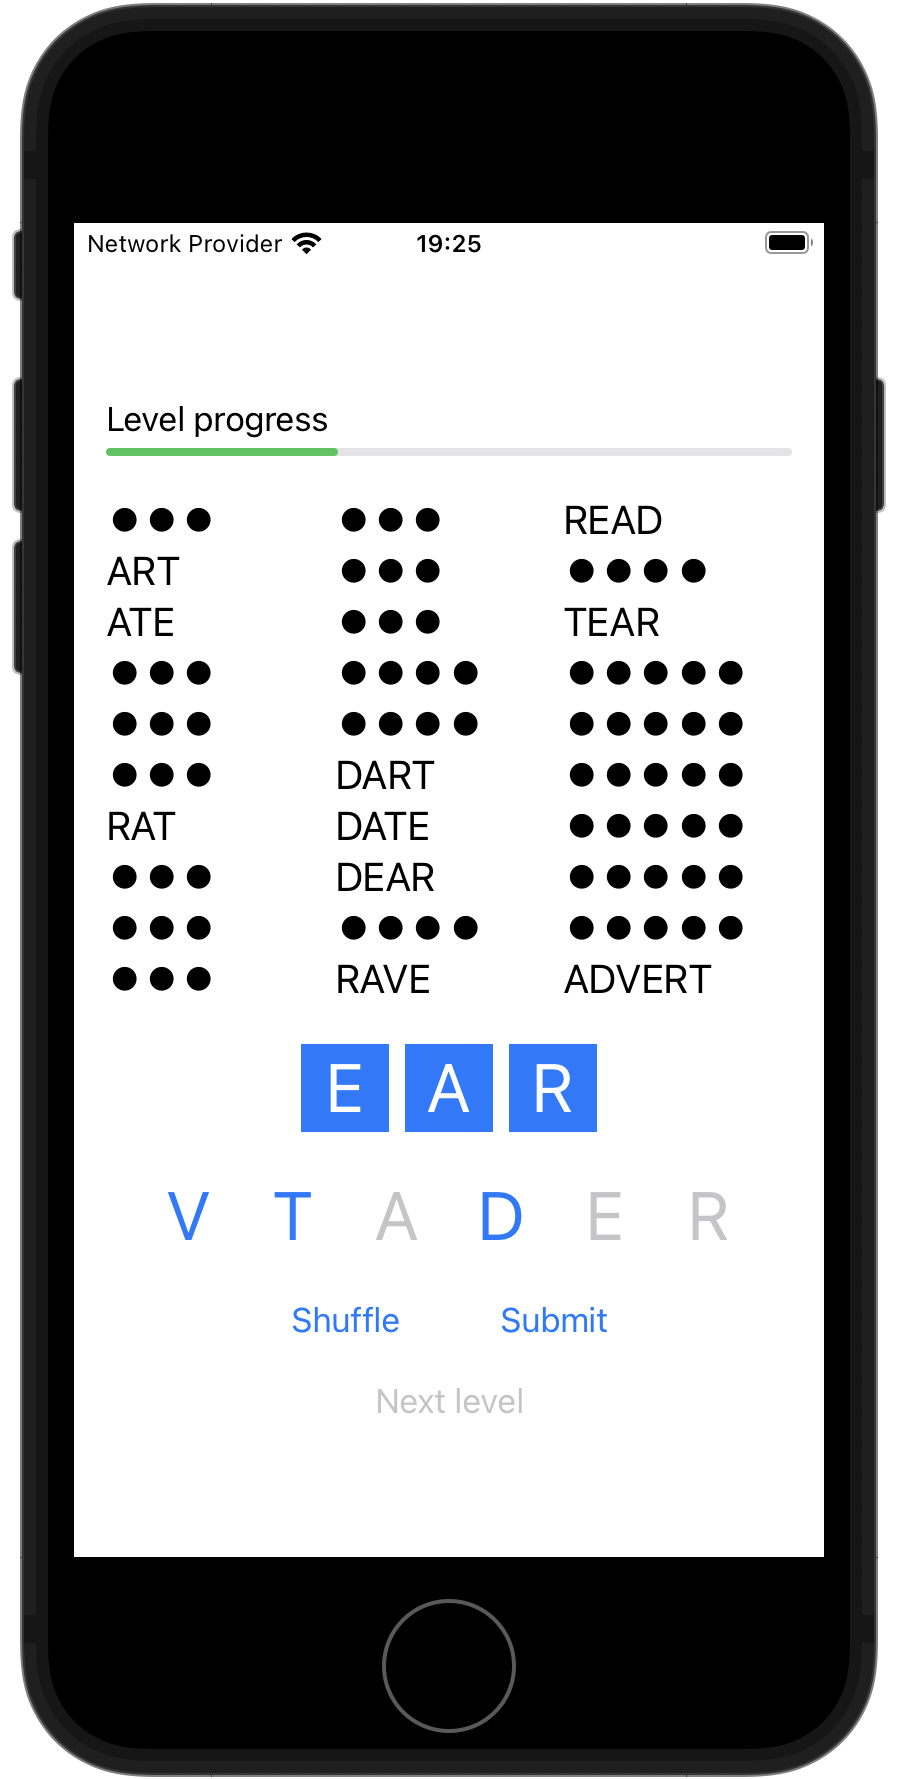
Scramblet, a word game Paul had us made in a bit more than an hour.
Embedded Swift Community Hour
The next meet-up happens this Friday March 28th at 6PM CET. Join us for a nice conversation between people passionate about Embedded Swift.
In the meantime, feel free to get in touch on Mastodon.