Vision OS for an existing app
Introduction
As a simple intro into visionOS, I used the most simple app I have, AWG Convert, and set-up to add native support for visionOS to it.
I added an “Apple Vision” destination to my project, launched the app in the simulator and started to tweak the code to make it look slightly better in the Vision Pro. Just the basics here, not really taking advantage of Spatial Computing, baby steps.
The biggest work I had to do was in making the UI more responsive, as the iPhone version was locked to only portrait mode. See Interface orientation in visionOS for some exploration I did as a preparation to this.
When I thought I had something OK, that at least was better than the “compatibility mode”, I went on to publishing the update on the AppStore and discovered there were a few “details” I still needed to take care of.
Providing an app icon
I naively thought that, as I already had an icon for my iPhone app, the same one would just be used. Not the case.
Looking at Configuring your app icon | Apple Developer Documentation I could see that tvOS and visionOS have specific OS variants for the app icon. And those are not simple images but multi-layered.
I thus added the variant in Xcode in the assets catalog.
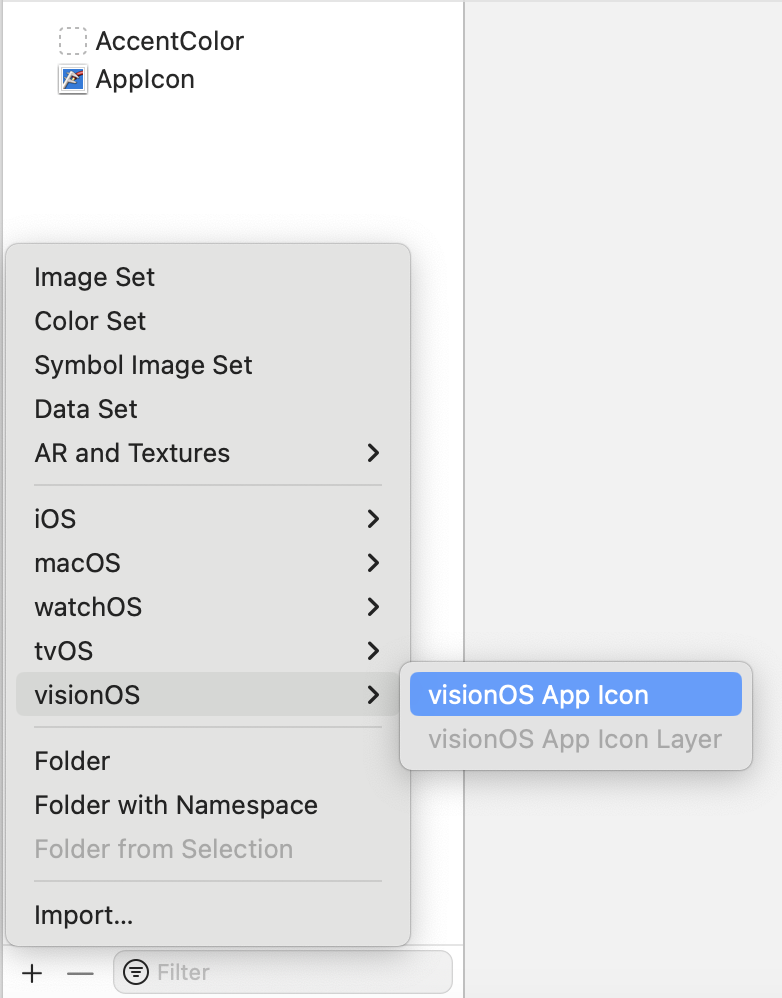
Adding a vision OS App Icon
A visionOS has by default 3 layers (the maximum it can have) and must have minimum 2 layers.
Exploring visionOS Fundaments: Creating the App Icon is a nice article with some more information on creating icons for visionOS.
Taking a screenshot
Searching in Apple documentation on how to take screenshots for Vision Pro, all I could find was Capturing screenshots and video from Apple Vision Pro for 2D viewing | Apple Developer Documentation. But this requires a physical device, there is no indication on how to capture using the simulator.
So I did it like for other iOS devices and used the “Save Screen” button in the simulator.
Doing this results in images with a resolution of 2732 x 2048 pixels. But looking at the specifications from Apple (Screenshot specifications - Reference - App Store Connect - Help - Apple Developer), it indicates that the screenshots for Apple Vision Pro must have a resolution of 3840 x 2160.
So a bit of post-processing is required. You can definitely do it using your favorite tool like Pixelmator or PhotoShop but I wanted a quick and easy solution for my first test submission.
Luckily enough, macOS includes a command-line tool that comes in handy. Using the following 2 commands, I got an image at the right resolution.
 sips -z 2879 3840 Simulator\ Screenshot\ -\ Apple\ Vision\ Pro\ -\ 2024-02-02\ at\ 21.16.15.png
 sips -c 2160 3840 Simulator\ Screenshot\ -\ Apple\ Vision\ Pro\ -\ 2024-02-02\ at\ 21.16.15.png
This first command scales-up the image to the desired width, the second crops it vertically to get the desired final resolution. So be careful how you center your app content when taking the screenshot, as some part at the top and bottom will be discarded.
A separate distribution for visionOS
So I logged into App Store Connect and looked at creating a new version of my application.
So far I only had applications that were targeted at iPhones and iPads and I thought targetting Vision Pro in addition would work the same.
But no, I saw that I needed to add a different Platform for the application (for visionOS) and that the iOS and visionOS apps can have different lifecycles. But the make things cleaner, I aligned the version numbers for both platforms.
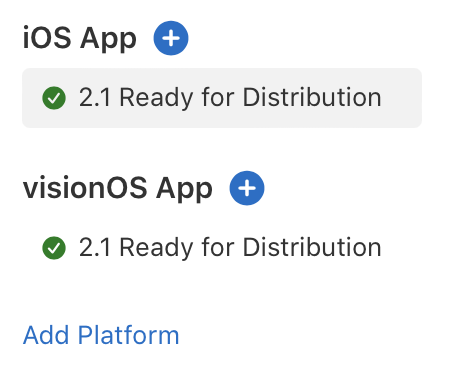
iOS and visionOS platforms added in App Store Connect
Building for distribution
The next surprise came when I wanted to create an archive of the project for uploading to the App Store, as there was no destination for a visionOS device available.
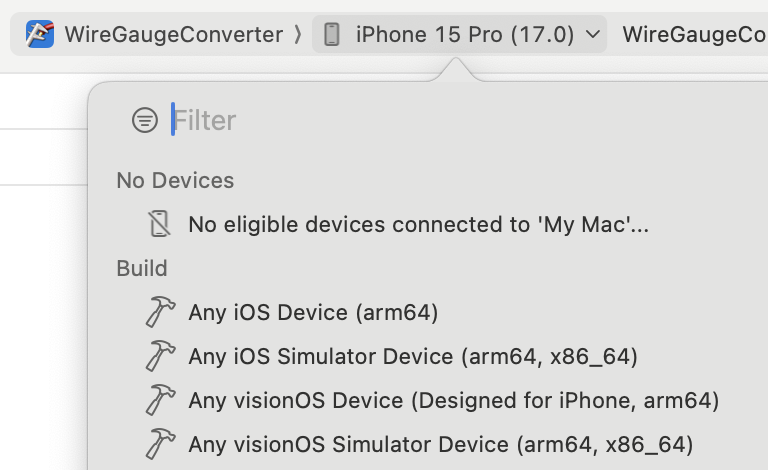
visionOS does not appear in the list of destination
Googling a bit, I quickly found an answer on the Apple Developer Forums: Xcode Not showing Vision Pro Archive destination. And although it mentions Xcode 15.2 Beta, it’s still the case with the final 15.2 version.
So changing the Base SDK from it’s original iOS
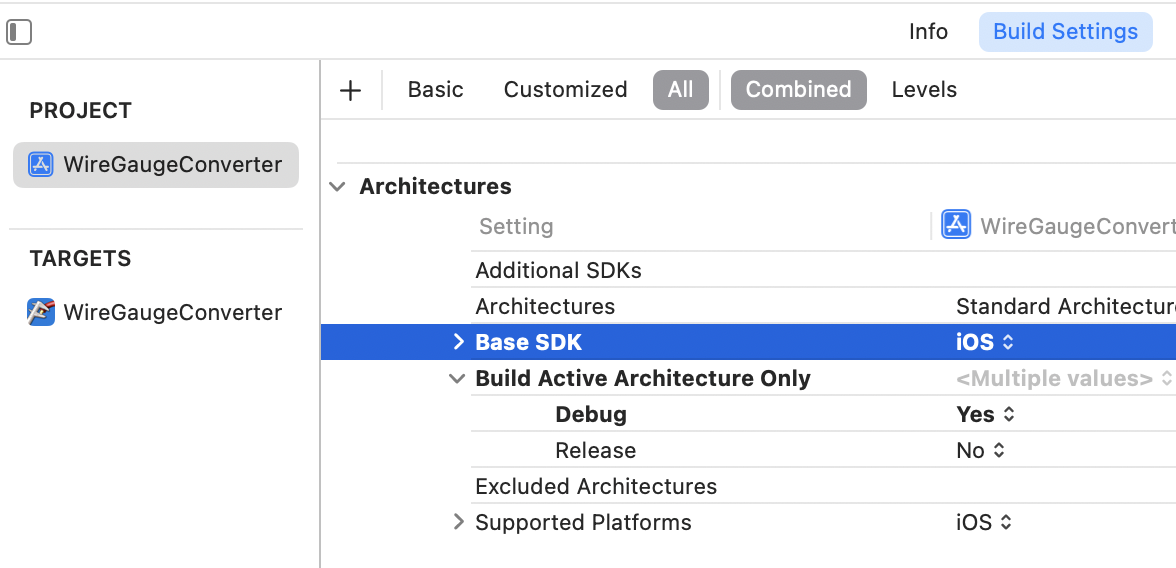
iOS is set as the base SDK for the project
to visionOS
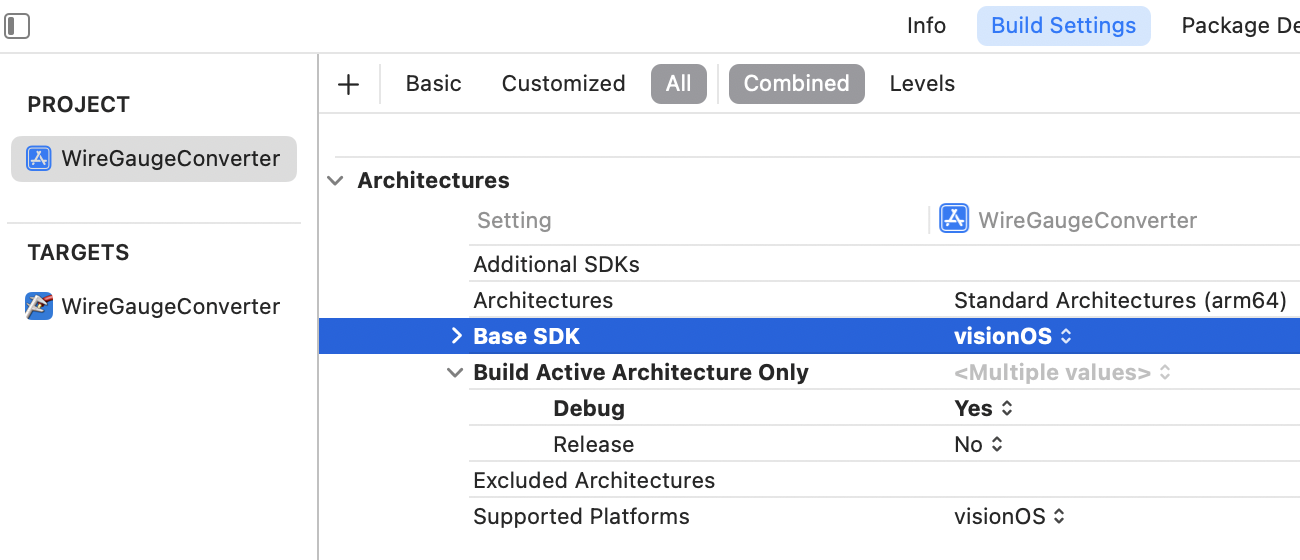
After changing the base SDK to visionOS
made the required destination appear in the menu.
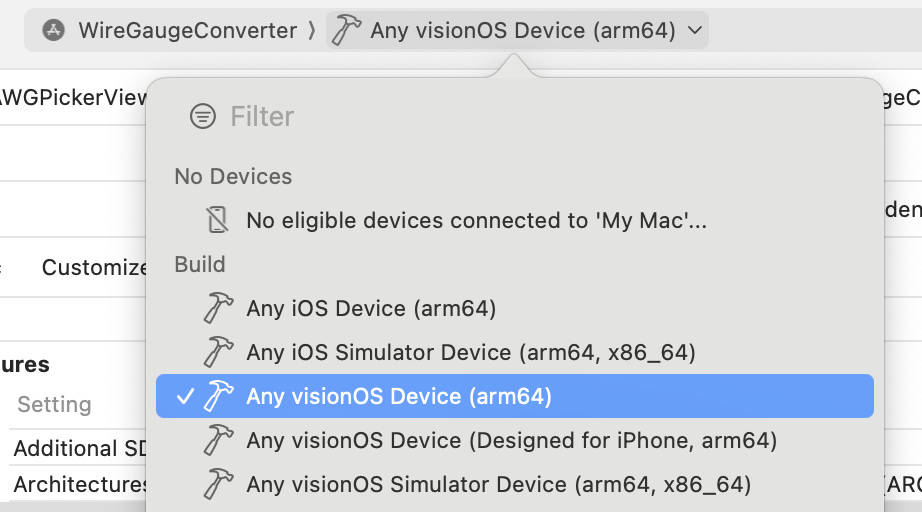
visionOS now does appear in the list of destination
And with that, I was able to create a build and upload it to the App Store.
Being on the store
The review process took 3 days and my app was accepted on the store.
So AWG Convert is now available for Apple Vision Pro.
Not much to brag about, as this was the bare minimum for native visionOS support, but at least it helped me discovered the steps required to release an app for Vision Pro.
Now let’s get to work on the next one…